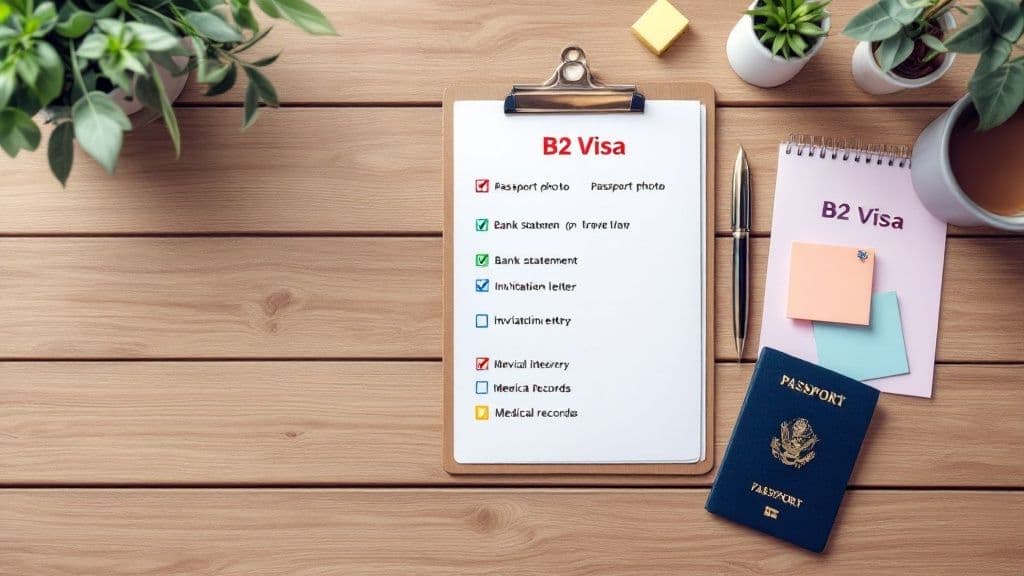
Planning a trip to the United States for tourism, a family visit, or medical treatment? The B2 visa is your key, but navigating the document requirements can feel like a maze. A single missing paper or an incorrectly filled form can lead to frustrating delays or even an outright denial of your application. This is where a thorough B2 visa documents checklist becomes your most crucial tool. It transforms a complex process into a series of clear, manageable steps.
This comprehensive guide breaks down every essential item you need to prepare for your application and interview. We move beyond a simple list, offering actionable tips, practical examples, and crucial warnings about common pitfalls associated with each document. From successfully completing the DS-160 form to proving strong ties to your home country, we cover it all.
By following this detailed checklist, you will approach your visa interview organized, confident, and fully prepared to present a compelling and transparent case for your temporary visit. This guide is designed to eliminate the guesswork and anxiety from the process, getting you one step closer to your American adventure. Let's begin assembling your application package for success.
1. Form DS-160 (Online Nonimmigrant Visa Application)
The Form DS-160 is the foundational document of your B2 visa application. As the first item on any B2 visa documents checklist, this comprehensive online form is your official request to the U.S. government for a temporary visitor visa. It collects all essential biographical, travel, and security background information, which the consular officer will review before and during your interview.
Accuracy and consistency on this form are non-negotiable. Every piece of information, from your planned travel dates to your employment history, must be truthful and align with your supporting documents. The DS-160 generates a unique barcode on a confirmation page upon submission; this page is mandatory for your interview appointment.
Key Steps and Best Practices
To ensure a smooth application process, follow a structured approach. The journey from starting to submitting your DS-160 involves several critical stages.
Gather Information First: Before starting the form, collect all necessary details. This includes your passport, travel itinerary, previous U.S. travel dates, and contact information for your U.S. host or hotel.
Save Frequently: The online portal can time out. Use the "Save" feature often and note your Application ID and the answer to your security question. This allows you to retrieve your application if you get disconnected.
Answer Completely: Do not leave any applicable fields blank. If a question does not apply to you, select the "Does Not Apply" option.
This infographic outlines the core workflow for completing and submitting your Form DS-160 online.
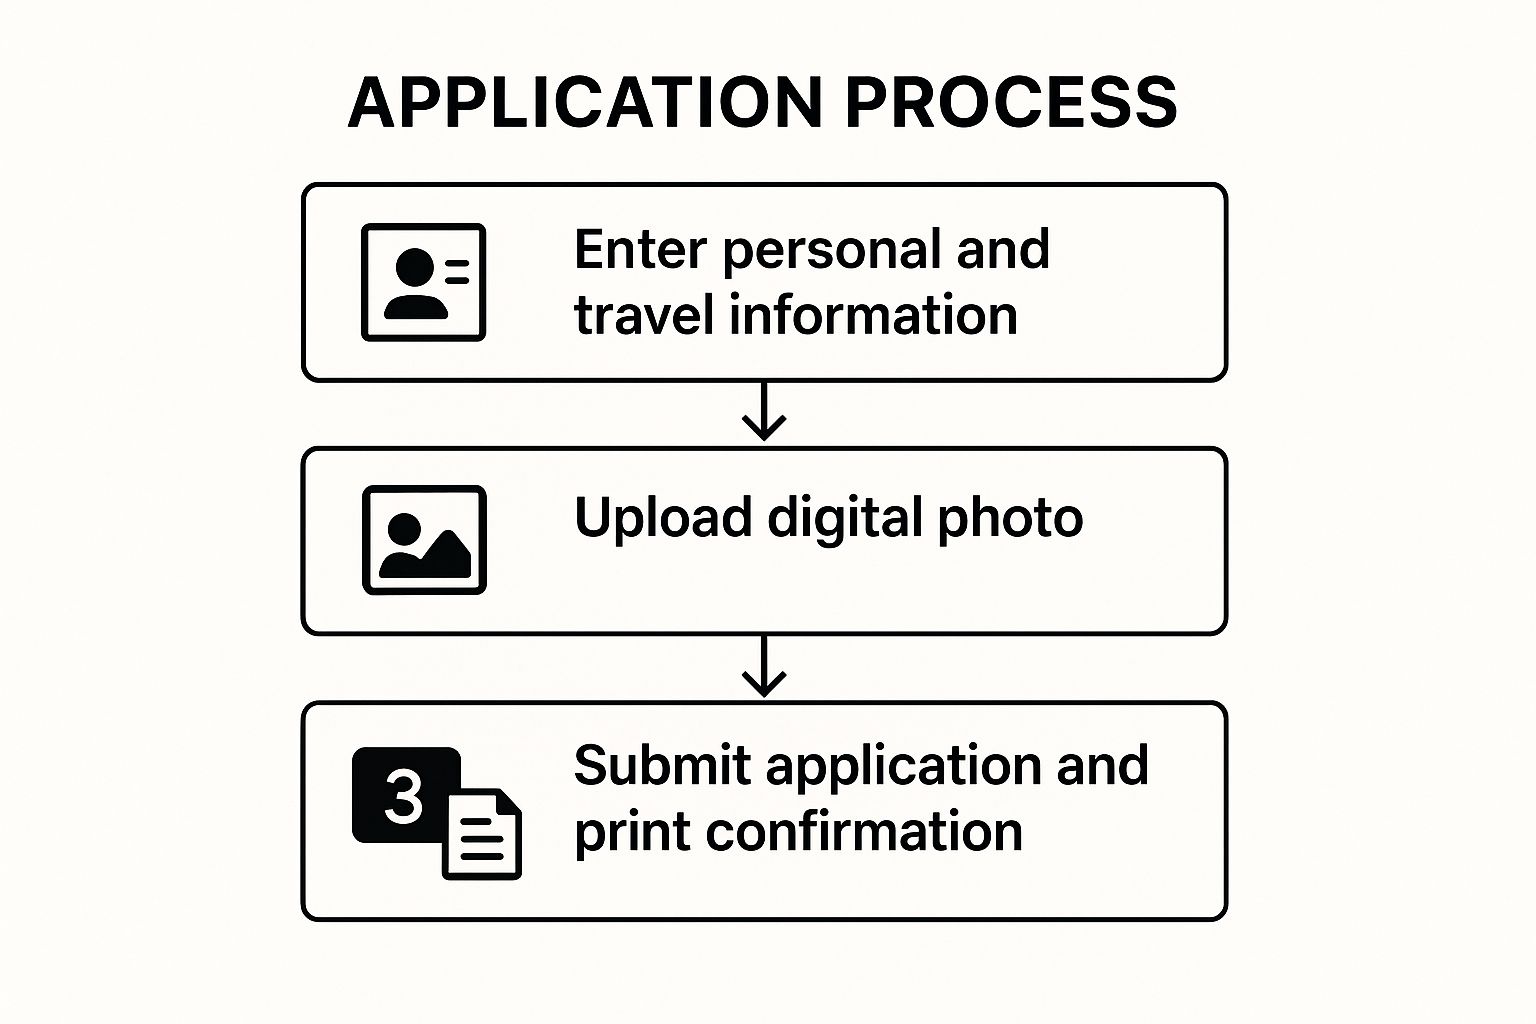
Following this simple three-step process ensures you complete all necessary actions, culminating in the crucial confirmation page required for your interview.
2. Valid Passport
Your passport is the most critical piece of identification in your B2 visa documents checklist. It serves as the primary, internationally recognized proof of your identity and nationality. For your B2 visa application to be considered, your passport must meet specific U.S. government requirements, primarily concerning its validity period and physical condition.
The "six-month validity rule" is a key requirement: your passport must be valid for at least six months beyond your intended period of stay in the United States. This rule ensures that your travel document will not expire while you are in the country. Additionally, the passport must have at least one completely blank page available for the visa stamp to be placed by the U.S. embassy or consulate.
Key Steps and Best Practices
Verifying your passport's compliance early is essential to avoid last-minute complications that could derail your travel plans. A damaged or expiring passport can lead to an automatic denial, so proactive checks are vital.
Check the Expiration Date: As soon as you plan your trip, confirm your passport's expiration date. If it doesn't meet the six-month validity rule, begin the renewal process immediately, as this can take several weeks or months.
Inspect for Damage: Carefully examine your passport for any significant damage, such as water stains, tears, or a detached cover. A compromised document may be deemed invalid by the consular officer.
Ensure Name Consistency: The name on your passport must exactly match the name on your Form DS-160 and all other supporting documents. Any discrepancies can cause significant delays or application rejection.
Make Digital and Physical Copies: Always keep copies of your passport's biographical page. This is crucial for backup in case the original is lost or stolen during your travels.
3. Passport-Style Photograph
A recent, compliant passport-style photograph is a critical component of your B2 visa documents checklist. This isn't just any photo; it's a biometric identifier used by U.S. authorities to verify your identity. The photograph must have been taken within the last six months to reflect your current appearance and must adhere to strict technical specifications set by the U.S. Department of State.
This photo will be uploaded digitally to your DS-160 application and you will likely need to bring a physical copy to your visa interview. A non-compliant photo is a common reason for application delays or rejections, making it essential to get this right from the start. For example, a student might have their application stalled because their photo had a colored background instead of the required plain white.

Key Steps and Best Practices
To avoid common pitfalls and ensure your photo is accepted without issue, follow a precise set of guidelines. Getting this step correct prevents unnecessary complications later in the process.
Use a Professional Service: Don't try to take the photo yourself. Professional visa photo services, often found at drugstores or specialized studios, are familiar with the exact size (2x2 inches or 51x51 mm), background, and lighting requirements.
Adhere to Appearance Rules: Maintain a neutral facial expression with both eyes open. Avoid wearing glasses if possible. If you must wear them for medical reasons, ensure there is no glare on the lenses. Head coverings are only allowed for religious reasons, and they must not obscure your face.
Check Digital and Physical Quality: Before uploading the digital image to the DS-160 form, verify that it is not blurry, grainy, or pixelated. Also, get at least two physical copies printed on quality photo paper to bring to your interview as a backup.
4. Proof of Financial Support
Proof of financial support is a critical component of your B2 visa documents checklist. This collection of documents serves as tangible evidence to the consular officer that you have sufficient funds to cover your entire trip to the United States without resorting to unauthorized employment. It demonstrates your ability to pay for transportation, accommodation, daily expenses, and any potential emergencies.
The officer must be convinced that you are not a potential financial burden on the U.S. and can comfortably afford your visit. A well-prepared and transparent financial portfolio significantly strengthens your application by showcasing your economic stability and reinforcing your intention to return to your home country after your temporary stay.
Key Steps and Best Practices
To effectively prove your financial capacity, you must present clear, organized, and verifiable evidence. Your goal is to paint a complete picture of your financial health, leaving no room for doubt.
Compile Comprehensive Bank Records: Gather the last 6 to 12 months of bank statements. These should show a consistent income stream, a stable balance, and regular financial activity. Avoid sudden, large, unexplained deposits just before your interview.
Include Multiple Funding Sources: If applicable, supplement bank statements with other evidence like fixed deposit receipts, stock portfolio statements, property ownership documents, or pay stubs. For sponsored trips, include a notarized affidavit of support from your sponsor along with their financial documents.
Prepare a Trip Budget: Create a simple document outlining your estimated trip costs. Itemize expenses like flights, hotels, food, and tourism activities. This shows the consular officer you have planned responsibly and your available funds align with your proposed itinerary.
This infographic details the types of documents you can use to build a strong financial proof package.
Presenting a diverse and well-documented financial profile is one of the most effective ways to satisfy the visa officer of your ability to fund your trip.
5. Travel Itinerary and Purpose of Visit Documentation
Your travel itinerary and purpose of visit documentation serve as the roadmap for your trip, demonstrating to the consular officer that you have a clear, legitimate, and well-planned reason for visiting the United States. This package of documents is a critical part of any B2 visa documents checklist as it substantiates the claims made on your DS-160 form and proves your visit is temporary and for a permissible purpose, such as tourism, visiting family, or receiving medical treatment.
A detailed plan reassures the officer of your intentions and strengthens your ties to your home country by outlining a specific, finite period of travel. Whether you are a tourist booking national park tours or a family member attending a wedding, this documentation provides tangible evidence of your plans.

Key Steps and Best Practices
To compile a convincing set of documents, your approach should be organized and specific to your travel purpose. Your goal is to create a cohesive narrative that leaves no room for doubt about your intentions.
Tailor to Your Purpose: Customize your documents to your specific reason for travel. For a family reunion, include an invitation letter from your U.S. relatives with event details. For medical treatment, provide appointment confirmations and correspondence from the U.S. hospital.
Book Refundable Options: It is highly recommended to book refundable flights and accommodations. This shows a concrete plan without risking significant financial loss if the visa is not approved.
Be Detailed and Organized: Present your daily itinerary in a clear, easy-to-read format. Include dates, locations, accommodation details, planned activities, and contact information for any hosts or tour operators. A well-organized plan reflects a serious and prepared applicant.
Demonstrate Return Intent: Crucially, your itinerary must include a return ticket reservation. This is one of the strongest pieces of evidence that you intend to depart the U.S. at the end of your authorized stay.
For expert assistance in organizing your purpose of visit documentation, you can learn more about personalized B2 visa support on vastfisa.com.
6. Ties to Home Country Documentation
Ties to home country documentation are arguably the most critical part of your B2 visa documents checklist. This collection of evidence serves one primary purpose: to convince the consular officer that you have compelling reasons to return to your country after your temporary visit to the U.S. Under U.S. law, every B2 visa applicant is presumed to have "immigrant intent," and this documentation is your key to overcoming that presumption.
These documents must paint a clear picture of a stable, established life that you are unwilling to abandon. The evidence should demonstrate strong social, economic, professional, and familial connections. The officer needs to see that your trip is temporary and that you have significant responsibilities and relationships waiting for you back home.
Key Evidence and Best Practices
To build a convincing case, you must provide a well-rounded portfolio of documents that cover multiple aspects of your life. Relying on a single type of connection is rarely sufficient.
Employment and Financial Ties: Provide an employment verification letter stating your position, salary, and approved leave dates. Business owners should include business registration documents, tax records, and evidence of ongoing operations. Bank statements, property deeds, and investment portfolios also demonstrate financial stability.
Family and Social Ties: Documents like marriage certificates, birth certificates of children, and evidence of caring for elderly parents are powerful indicators. Proof of children's school enrollment or your own enrollment in an educational program also shows long-term commitments.
Translate and Organize: All documents not in English must be accompanied by a certified translation. Organize your papers logically so you can present them clearly to the officer if requested. Explain how each document proves a specific tie.
Presenting a comprehensive set of documents from various categories creates a much stronger and more credible narrative of your intent to return home.
7. Visa Application Fee Payment Receipt (MRV Fee)
The Visa Application Fee Payment Receipt, often called the MRV (Machine Readable Visa) fee receipt, is your proof of payment for the B2 visa application service. This non-refundable, non-transferable fee is a mandatory part of any B2 visa documents checklist. Paying this fee is the final step before you can schedule your visa interview, and the receipt number is required to book your appointment.
This document confirms to the U.S. consulate that you have covered the costs associated with processing your application. Without a valid receipt, you cannot move forward in the process. The fee amount can vary, so it is crucial to verify the current fee for your specific country of application through the official U.S. Department of State's travel website or the local embassy's site.
Key Steps and Best Practices
Successfully paying your MRV fee and securing the receipt requires careful attention to detail. The payment method and process can differ significantly from one country to another, so always follow the specific instructions provided for your location.
Verify Payment Options: Before paying, check the local U.S. Embassy website for approved payment methods. These can range from online bank transfers and credit card payments to cash deposits at designated banks.
Keep Multiple Copies: Once you receive your payment confirmation, save both a digital copy and print several physical copies. You will need to bring one to your interview, and having backups prevents last-minute issues.
Pay for Each Applicant: If you are applying with family members, remember that each individual applicant, including children, requires a separate MRV fee payment and its corresponding receipt.
Note the Expiration Date: The MRV fee payment is typically valid for one year from the date of payment. You must schedule an interview appointment within this one-year period, or the fee will expire and you will need to pay again.
8. Interview Appointment Confirmation
The Interview Appointment Confirmation letter is the golden ticket to your visa interview. As a non-negotiable item on your B2 visa documents checklist, this document serves as official proof that you have a scheduled meeting with a consular officer at a specific U.S. embassy or consulate. It contains the precise date, time, and location of your appointment, along with your DS-160 confirmation number.
Without this printed confirmation, you will be denied entry to the consular section. This letter is generated after you successfully schedule your appointment through the official U.S. visa service portal for your country. The consular officer will scan the barcode on this page to retrieve your application details, making it a critical component of the check-in and interview process.
Key Steps and Best Practices
Securing and preparing for your interview requires careful attention to detail. From the moment you book your slot to the day you arrive at the consulate, following a clear set of procedures will prevent last-minute complications and ensure you are fully prepared for this final step.
Print and Protect: Always print a clear, high-quality copy of the confirmation page. Keep it in a waterproof folder along with your passport and DS-160 confirmation to prevent damage.
Review Instructions: Each consulate has specific security protocols. Carefully read the instructions on your appointment letter regarding prohibited items (like electronics and large bags) and arrival times. For instance, some consulates ask you to arrive no more than 15 minutes before your scheduled time.
Prepare Your Documents: Use the appointment confirmation as a final checklist. Gather all the mandatory and supporting documents mentioned in your application and organize them for easy access during the interview. To gain a deeper understanding of the scheduling process, you can learn more about U.S. visa appointment booking on vastfisa.com.
B2 Visa Document Checklist Comparison
Item | Implementation Complexity | Resource Requirements | Expected Outcomes | Ideal Use Cases | Key Advantages |
|---|---|---|---|---|---|
Form DS-160 (Online Nonimmigrant Visa Application) | Moderate - Online form with detailed inputs | Internet access, digital photo, personal data | Completed visa application confirmation | All nonimmigrant US visa applicants | Streamlined digital process, real-time error checks |
Valid Passport | Low - Obtain or renew through government | Time, fees, official documents | Proof of identity and nationality | Required for all international travel | Universally accepted, secure travel document |
Passport-Style Photograph | Low to Moderate - Requires strict compliance | Professional photo service, technical specs | Biometric-compatible visa photo | All visa applicants needing compliant photo | Standardization ensures application consistency |
Proof of Financial Support | Moderate - Collects multiple financial docs | Bank statements, employer letters, tax forms | Demonstrates financial ability | Applicants proving self-support or sponsorship | Establishes genuine intent and financial stability |
Travel Itinerary and Purpose of Visit Documentation | Moderate - Compile detailed plans and bookings | Hotel reservations, flights, invitations | Shows planned activities and visit purpose | Visitors needing to demonstrate visit details | Proves temporary intent with concrete schedule |
Ties to Home Country Documentation | Moderate to High - Collect varied tie documents | Employment letters, property deeds, family proofs | Evidence of return intent | Applicants addressing immigrant intent concerns | Strengthens application credibility and ties |
Visa Application Fee Payment Receipt (MRV Fee) | Low - Payment via specified channels | Payment method, correct fee amount | Proof of fee payment enabling interview | All B-2 visa applicants | Enables interview scheduling, flexible timing |
Interview Appointment Confirmation | Low - Receive and print confirmation | Printout or digital copy | Verified interview schedule and instructions | All applicants attending visa interview | Confirms official appointment with preparation info |
Your Next Steps to a Successful Visa Interview
Navigating the B2 visa application process can feel like a marathon, but by reaching this point, you have already covered the most critical ground. You now have a comprehensive understanding of the entire b2 visa documents checklist, from the digital precision required for your DS-160 to the tangible evidence of your ties to your home country. This checklist is more than a list of requirements; it is the framework for building a compelling and credible case for your temporary visit to the United States.
The central theme woven through every document is consistency. The information on your DS-160 must align perfectly with your passport, your financial statements must support your travel itinerary, and your evidence of home country ties must collectively paint a clear picture of your intent to return. Every piece of paper works together to tell your story to the consular officer.
From Checklist to Confidence: Your Action Plan
Your primary task now is to transition from knowledge to action. Do not just gather these documents; scrutinize them.
Review and Cross-Reference: Lay out all your documents and compare the key details: names, dates, addresses, and financial figures. A single inconsistency can raise unnecessary questions and create doubt. Ensure the narrative is seamless from one form to the next.
Organize for Clarity: Purchase a simple, professional folder with clear sleeves. Arrange your documents in a logical order, starting with the mandatory items like your passport and DS-160 confirmation, followed by supporting evidence. During the interview, you want to be able to retrieve any requested document in seconds, not fumble through a disorganized stack of papers. This demonstrates preparedness and respect for the officer's time.
Practice Your Narrative: While this article focuses on the b2 visa documents checklist, your documents are only half the battle. You must be able to articulate your purpose of visit clearly and concisely. Review your travel itinerary and be prepared to answer questions about who you will see, what you will do, and why you are traveling now. Your verbal answers must match the story your paperwork tells.
The Final Hurdle: Securing Your Interview Slot
One of the most common and frustrating challenges applicants face is securing a timely visa interview appointment. Long wait times can jeopardize travel plans, creating significant stress. You might have a perfectly prepared application, but it means little without the opportunity to present it.
This is where proactive planning becomes essential. Constantly checking the consulate’s portal for earlier openings is a tedious and often fruitless task. Rare cancellations and new slots are filled almost instantly, making it nearly impossible to secure one through manual refreshing alone.
Key Insight: A complete and accurate document portfolio is the foundation of your application, but securing a timely interview is the critical step that brings it all to life. Delays in this final stage can be the biggest obstacle to your travel plans.
With your documents meticulously organized and your case clearly defined, the final step is to ensure you get your chance to make a strong impression. By following this guide and taking these final preparatory steps, you are no longer just an applicant; you are a well-prepared candidate, ready to confidently present your case for a U.S. visitor visa.
Tired of endlessly refreshing the visa appointment portal? Let Vast Fisa handle the hassle for you. Our automated service scans for earlier B2 visa appointment slots 24/7 and instantly rebooks you, saving you time and stress. Secure your interview faster and focus on what matters: preparing for your trip by visiting Vast Fisa today.